Introduction
Have you ever found the perfect logo or picture for embroidery, only to discover that it is saved as a JPG or PNG? That is a common problem for beginners. An image may look perfect on a screen, but an embroidery machine needs something very different.
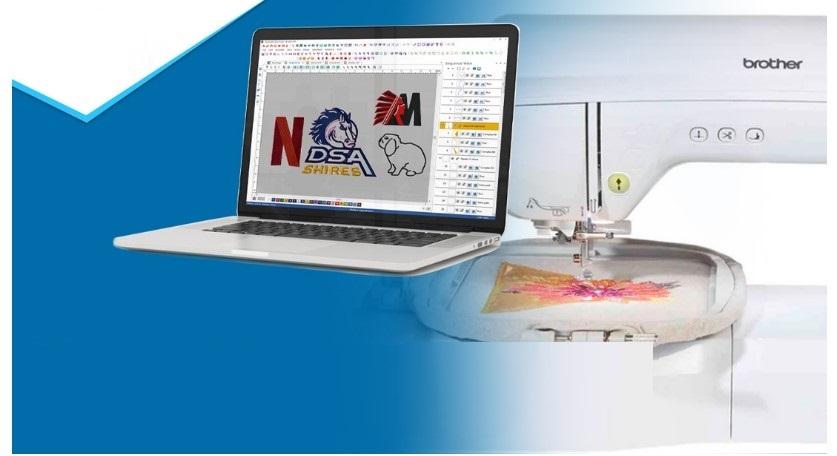
To change an image into PES embroidery format, you need to turn the artwork into stitches that an embroidery machine can understand. This process is called embroidery digitizing. It involves deciding stitch types, thread colors, stitch direction, density, and the order in which each part of the design will be sewn.
The good news is that you do not need to be an expert to understand how the process works. With the right preparation and digitizing approach, almost any suitable logo or artwork can be converted into a usable PES embroidery file.
In this guide, we will explain how image-to-PES conversion works, what you need before starting, common mistakes to avoid, and when professional digitizing is the better choice.
What Is a PES Embroidery File?
A PES file is a digital embroidery format designed to contain the instructions an embroidery machine needs to stitch a design.
Unlike a JPG or PNG, a PES file does not simply store pixels. It contains embroidery information such as:
-
Stitch locations
-
Stitch types
-
Thread colors
-
Stitch sequence
-
Stitch direction
-
Design size
-
Needle changes
-
Trims and jumps
Think of a regular image as a photograph of a finished painting. A PES file is more like a set of sewing instructions telling the machine exactly how to recreate the artwork with thread.
This is why simply changing the file extension from .jpg to .pes does not work. The artwork must first be professionally digitized.
Can You Change Any Image into PES Format?
Technically, many types of artwork can be converted into embroidery designs, but the quality of the original image matters.
Simple artwork is usually easier to digitize than a detailed photograph. Logos with clean outlines, limited colors, and clear shapes often produce better embroidery results.
Good source images usually have:
A low-quality image can still sometimes be digitized, but it may require additional artwork cleanup before the embroidery file is created.
How to Change an Image into PES Embroidery Format
The conversion process involves more than uploading an image and clicking a button. Here is a practical workflow.
1. Choose the Right Image
Start with the clearest version of your artwork.
A high-resolution PNG, JPG, PDF, or vector-style image can make the digitizing process easier. If you have several versions of the same logo, choose the one with the sharpest edges and clearest colors.
Avoid screenshots or heavily compressed images whenever possible.
2. Clean Up the Artwork
Before creating the embroidery file, inspect the image carefully.
Remove unnecessary backgrounds, unwanted objects, tiny details, and visual noise. If the artwork contains text, check that the letters are large enough to remain readable when stitched.
This stage is often called artwork preparation or embroidery design preparation.
A clean image gives the digitizer a much better foundation.
3. Decide the Final Embroidery Size
Size is extremely important.
A design that looks excellent at 10 inches may not work well at 2 inches. Small embroidery requires simpler shapes, fewer details, and carefully controlled stitch density.
Before digitizing, decide where the design will be used, such as:
-
Shirts
-
Jackets
-
Caps
-
Bags
-
Towels
-
Uniforms
-
Embroidered patches
The intended fabric and finished size can affect how the design should be digitized.
4. Convert Artwork into Stitch Objects
This is the main part of the process.
Instead of treating the artwork as pixels, the digitizer creates embroidery objects from its different sections. Each shape may require a specific stitch type.
Common embroidery stitch types include:
Satin stitch: Often used for borders, lettering, and narrow shapes.
Fill stitch: Useful for covering larger areas with thread.
Running stitch: Suitable for outlines, fine details, and delicate lines.
The right stitch type depends on the shape, size, fabric, and desired appearance.
5. Set Stitch Direction
Stitch direction can dramatically change how an embroidered design looks.
Different sections should not always have the same stitch angle. Changing stitch direction can help define shapes, improve texture, and make the artwork look more natural.
For example, a curved section may require a different stitch direction than a straight border.
Good digitizing is not simply about filling every shape with stitches. It is about controlling how those stitches interact with the fabric.
6. Apply Underlay Stitches
Underlay provides a foundation beneath the visible stitches.
It can help stabilize fabric, support the top layer, and improve coverage. The appropriate underlay depends on the fabric and design.
Too little support can cause poor coverage or distortion. Too much underlay can create unnecessary bulk.
This is one reason professional embroidery digitizing requires experience rather than simple file conversion.
7. Adjust Stitch Density
Stitch density refers to how closely stitches are placed together.
If density is too low, the fabric may show through. If it is too high, the design can become stiff, bulky, or difficult to sew.
The correct density depends on several factors, including:
-
Fabric type
-
Thread type
-
Design size
-
Stitch type
-
Design complexity
-
Underlay
A good digitizer balances these factors instead of using the same settings for every design.
8. Set Thread Colors
The colors in your original artwork need to be translated into embroidery thread colors.
Keep in mind that thread does not always look exactly like a color displayed on a computer monitor. The final appearance can also change depending on the fabric and lighting.
For brand logos, maintaining recognizable colors is especially important.
9. Set the Stitch Sequence
The embroidery machine needs to know which section to sew first, second, third, and so on.
A logical stitch sequence can reduce unnecessary jumps, trims, color changes, and thread breaks.
Good sequencing also helps prevent certain areas from becoming distorted as the design is sewn.
10. Save the Design as a PES File
After the artwork has been digitized and checked, it can be exported in PES format.
Before saving, confirm:
-
The design dimensions are correct.
-
The stitch count is reasonable.
-
Thread colors are assigned properly.
-
The stitch sequence is logical.
-
The design fits the intended hoop.
-
Excessive jumps and trims have been minimized.
At this point, the design is ready for testing.
Image to PES Conversion vs. Simple File Conversion
There is an important difference between converting an image to PES and simply changing a file format.
A JPG contains pixels. A PES file contains embroidery instructions.
For example, imagine you have a black circle in a JPG. A computer sees thousands of pixels forming a circle. An embroidery machine needs to know whether that circle should use a fill stitch, satin stitch, or another stitch structure.
It also needs to know the stitch angle, density, start point, end point, thread color, and sewing order.
That is why real image-to-PES conversion is essentially a digitizing process.
Can Online Tools Convert Images to PES?
Some software and online tools can assist with embroidery file conversion or automated digitizing. They may be useful for simple projects and experimentation.
However, automatic conversion does not always understand the practical requirements of embroidery.
An automated system may create:
For a personal test design, automated tools may be worth exploring. For business logos, uniforms, merchandise, or customer orders, professional digitizing can provide more predictable results.
How Digitizing Buddy Can Help
At Digitizing Buddy, image artwork is treated as the starting point rather than the finished embroidery design.
The goal is to create embroidery-ready artwork that considers stitch structure, fabric behavior, design size, and machine requirements.
Professional digitizing can be especially useful when you need to:
-
Convert a business logo into PES format
-
Prepare artwork for machine embroidery
-
Improve stitch quality
-
Simplify complex artwork
-
Create embroidery-ready lettering
-
Prepare designs for different fabric types
-
Produce files for commercial embroidery projects
Instead of expecting the machine to interpret a picture, the artwork is prepared with the sewing process in mind.
Tips for Better Image-to-PES Results
If you want your embroidery design to look clean and professional, keep these tips in mind.
Use High-Quality Artwork
The clearer your source image, the easier it is to identify its shapes and details.
Avoid Tiny Details
Very small elements may disappear when translated into thread. Simplifying them can actually make the finished design look better.
Consider the Fabric
A design intended for a stable woven fabric may require different settings from one intended for stretchy clothing.
Choose the Final Size First
Do not create a highly detailed large design and assume it will automatically look good when reduced.
Test Before Large Production
Always stitch a sample when possible. A test run can reveal problems that are difficult to see on a computer screen.
Check the Design in Simulation
Before stitching, review the embroidery sequence and simulated design. Look for unnecessary jumps, awkward color changes, gaps, and areas with excessive stitching.
Common Mistakes When Creating PES Files
Mistake 1: Renaming the File Extension
Changing logo.jpg to logo.pes does not create a real embroidery file.
The file must contain actual stitch data.
Mistake 2: Using Too Much Detail
An image can contain tiny lines and textures that simply cannot translate well into thread.
Simplifying the artwork often produces a cleaner result.
Mistake 3: Ignoring Fabric Type
The same digitizing settings may not perform equally well on denim, cotton, fleece, stretch fabric, or caps.
Mistake 4: Using Incorrect Stitch Density
Too many stitches can cause puckering and stiffness, while too few can result in poor coverage.
Mistake 5: Skipping a Test Stitch
A design that looks perfect on screen may behave differently once stitched.
Testing helps catch problems before production.
What Makes a PES Embroidery Design Professional?
A professional embroidery file is not judged only by whether the machine can open it.
Quality also depends on how the design sews and looks afterward.
A well-prepared PES design should have:
-
Clean stitch coverage
-
Appropriate stitch density
-
Logical stitch sequencing
-
Controlled thread changes
-
Suitable underlay
-
Good pull and push compensation
-
Clean lettering
-
Smooth outlines
-
Correct sizing
-
Minimal unnecessary jumps
The ultimate test is the embroidered sample, not just the digital preview.
When Should You Use Professional Digitizing?
If your design is a simple shape for personal use, you may be comfortable experimenting with embroidery software.
Professional help becomes more valuable when the artwork is a company logo, has small lettering, contains multiple details, or will be produced in large quantities.
It can also save time. Instead of repeatedly testing settings and fixing stitch problems, an experienced digitizer can build the design with embroidery requirements in mind from the beginning.
Final Thoughts
Learning how to change an image into PES embroidery format is easier when you understand what actually happens during the process. A picture cannot simply be renamed as a PES file. It needs to be converted into carefully planned stitches.
Start with clean artwork, select the correct final size, simplify unnecessary details, choose suitable stitch types, control density, plan the stitch sequence, and always test the finished design.
For simple projects, embroidery software can be a useful learning tool. For logos and production work, professional digitizing can help you achieve cleaner, more reliable results.
With the right preparation and attention to stitch quality, your favorite artwork can become an embroidery design that looks great not only on your screen, but also on real fabric.
FAQs
1. How do I change an image into PES embroidery format?
You need to digitize the image using embroidery software or a professional digitizing service. The artwork is converted into stitch objects, assigned thread colors, optimized for fabric, and then exported as a PES file.
2. Can I convert a JPG directly to PES?
Not through a simple file-format change. A JPG contains pixels, while PES contains embroidery stitch instructions. The artwork must be digitized before it becomes a functional PES embroidery design.
3. What type of image works best for PES conversion?
High-resolution logos and artwork with clear shapes, strong contrast, and limited colors are usually easier to digitize. Simple artwork generally produces cleaner embroidery than highly detailed images.
4. Why does my converted embroidery design look different from the original image?
Thread behaves differently from pixels. Stitch direction, density, fabric type, thread color, and design size can all affect the final embroidered appearance.
5. Can Digitizing Buddy create PES embroidery files?
Yes. Digitizing Buddy can help turn suitable artwork and logos into professionally prepared PES embroidery designs while considering stitch structure, sizing, fabric, and embroidery quality.





Share this page with your family and friends.